
Creating Notebooks
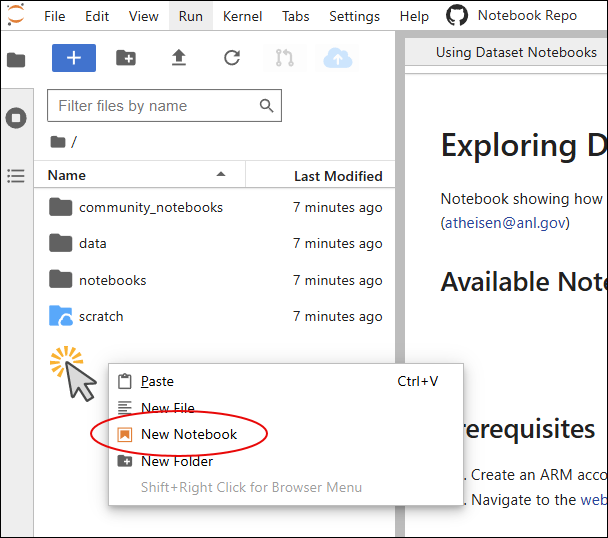
After logging in to your notebook environment, right-click in the file explorer panel and select "New Notebook" to create custom notebooks for exploring your data.
Notebook Location Options
When creating a new notebook, you need to choose where it will be stored. Your options depend on the purpose of your notebook and whether the dataset author has set up a repository for dataset-specific notebooks. Here are your available locations:
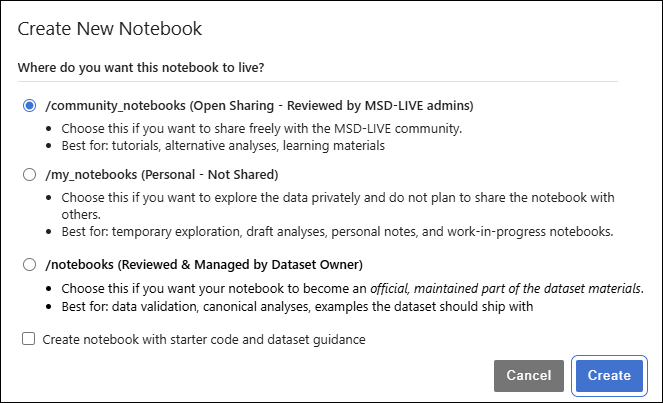
- /community_notebooks — For general or cross-dataset notebooks shared openly with the MSD-LIVE community (tutorials, alternative analyses, learning materials)
- /my_notebooks — For your own temporary notebooks that you do not plan to share with others. Select this location when you want to explore the data privately for your own purposes.
- /notebooks — For notebooks specific to this dataset that become an official, maintained part of the dataset materials (data validation, canonical analyses, examples the dataset should ship with). This option is only enabled if the dataset has a linked GitHub repository.
Warning
All notebooks created will be deleted at the end of your notebook environment session. To persist your notebook, you can:
- Submit it as a pull request to the community or dataset owner
- Copy the notebook to your scratch directory so you can resume work in a subsequent session
- Right-click and download the notebook to your local machine
Optional Starter Code and Dataset Guidance
When creating a notebook, you can check "Create notebook with starter code and dataset guidance" to pre-fill your notebook with examples and environment tips.
Use this option when you want a faster starting point with package imports, data-access hints, and notebook setup guidance.
Writing Notebooks
For detailed guidance on importing packages, accessing your data, and getting started with your analysis, see Writing Notebooks.